 Rina & Michael
How We Built a DIY Van Elevator Bed
By Michael · October 7, 2026
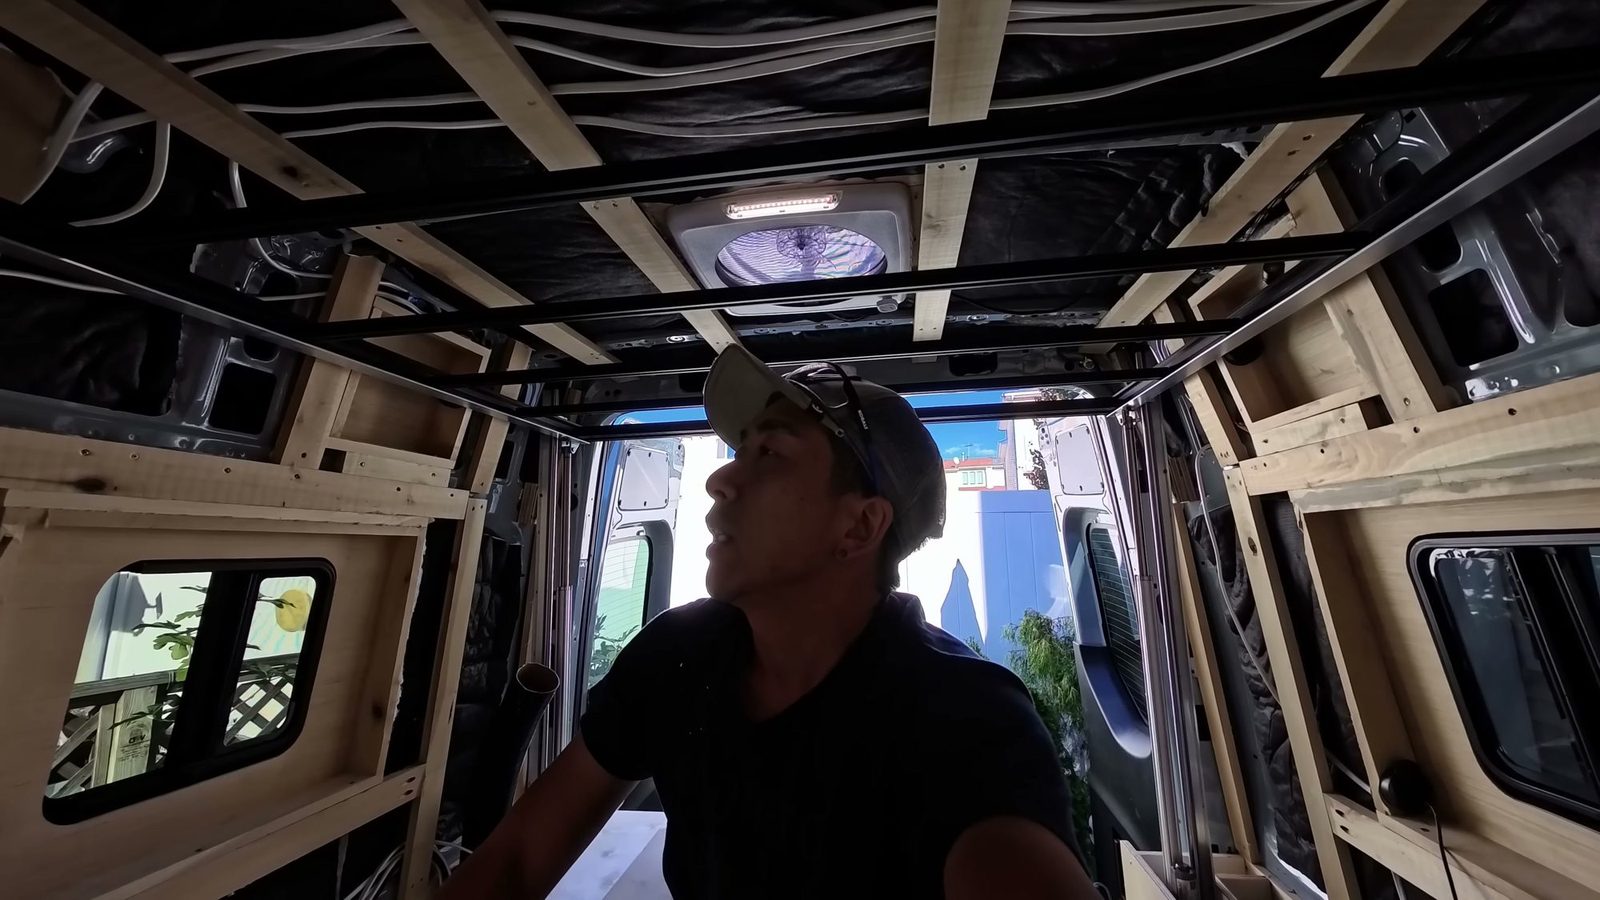
The back of our Sprinter has a bed that rides up to the ceiling on four linear actuators and comes down when you press a button. By day the floor below is our play and hangout platform, and at night the bed comes down for a second sleeping area. Here is how we built our DIY van elevator bed, the parts we used, and the mistakes we made along the way.
Safety: This is what we did in our own van, not professional advice. An elevator bed is a heavy moving load over people’s heads, and it runs on your 12 V electrical system. Mistakes can cause injury or fire. Follow the instructions for your actuators and controller, fuse your wiring, and consult a licensed professional if you’re not sure about any part of it.
What a van elevator bed is (and why we didn’t buy a kit)
A van lift bed is a bed frame that travels up and down on rails, so the same floor space can be a seating area by day and a bed at night. You can buy ready-made elevator-bed kits for camper vans. Michael looked at Happy Jack, and his rough guess for that kit was somewhere between “upwards of $2,000” and “$3,000 or whatever,” depending on which video you watch. Neither was a real quote.
Instead, we planned a DIY version Michael had seen on YouTube: a set of linear actuators, a controller to keep them synchronized, and some rails. When the frame was done, his verdict was that it came out a lot cheaper than buying a ready-made kit.
Watch why we went DIY instead of buying a kit
How our elevator bed works
There are four pieces, each with one job:
- Four rails guide the bed. There’s one rail at each corner. The rails keep the frame in place and let it slide up and down smoothly, but they don’t do any of the pushing or pulling.
- Four actuators do the lifting. They push the bed up and pull it down. Michael’s comparison was a standing desk: you press a button and it lifts up and down.
- One controller keeps them in sync. The synchronizing controller makes all four actuators move at the same speed. Without it, the bearing blocks on the rails would seize.
- One rocker switch runs it. A small up/down rocker switch connects to the controller. In the finished van it sits on our control panel next to the Victron display.
More on the whole system is on our elevator bed system page.
The rails: why we switched from Unistrut
Our first plan used Unistrut (strut channel) with trolleys. We returned it: too heavy and too loud. We ended up with VEVOR cylindrical rails, the precision kind used on CNC machines, with bearing blocks that travel along the tube. They’re quiet and don’t rattle when the van is moving. Links to the exact listings are on our full van build parts list, and here they are too: VEVOR SBR20 rail listing and the second VEVOR SBR20 listing.
Where the rails go
Sprinter walls curve. If we had mounted the rails on the furring strips, they would have stuck far out from the wall. So we mounted them on the van’s lower beam instead, with each rail sitting partly behind the wall. Bolting into the van’s beam makes them very secure.
We also thought about putting rails on the front and back walls, but the back wall’s curve would have made for a very short bed. The rails stayed on the side walls so the bed could be as long as possible.
Getting four rails square (the hard part)
In Michael’s words, the hardest part is really just getting the four rails square. Here’s the order we did it in:
- Top blocks. The top of each rail sits on a block made of two pieces of 3/4 in plywood glued together and screwed to the van’s frame.
- Measure rail to rail. We cut a board to the rail-to-rail distance at the top (56½ in in our van) and used that same board to set the distance at the bottom.
- Pack out the bottom. Because the wall curves, the bottom needed six pieces of 3/4 in plywood plus a 1/8 in piece to come out square. We then replaced that stack with one box of the same depth.
- Expect the back pair to be different. The back of the van is narrower, so the back blocks came out too thick. Michael trimmed about 1/8 in off each side with a hand saw.
- Square to the frame, not the van. His rule: no matter how wide the van is at any point, the frame needs to stay one constant size.
- Base pieces. Four wooden base pieces at the bottom anchor the lower rail bolts and later carry the actuators.
Build the frame to one constant size and pack the rails out to meet it. Don’t chase the van’s curves.
Get our complete van build parts list (free PDF)
Every part we kept in our Sprinter build, system by system, with links. Plus a short email series on how each system works.
No spam, unsubscribe anytime. Privacy.
Actuators, controller and wiring
We bought the actuator hardware from Firgelli Automations (not a sponsor or affiliate). Our order was:
- 4 × Super Duty linear actuators, 220 lb / 22”
- Actuator control board with LCD
- MB20 and MB17 brackets
- A rocker switch
Mounting the actuators
Each actuator sits directly in front of its rail block, so from the platform the two read as one piece.
The kit’s wall clamp bracket had no room because the motor was in the way, so we mounted each actuator from the bottom. The storage board under them isn’t load-bearing, so we added front-to-back boards between the support beams for the bases. Those bottom brackets carry the actuators and the bed.
The controller went low in the back, reachable for repairs, behind a cover board so storage doesn’t knock the wires.
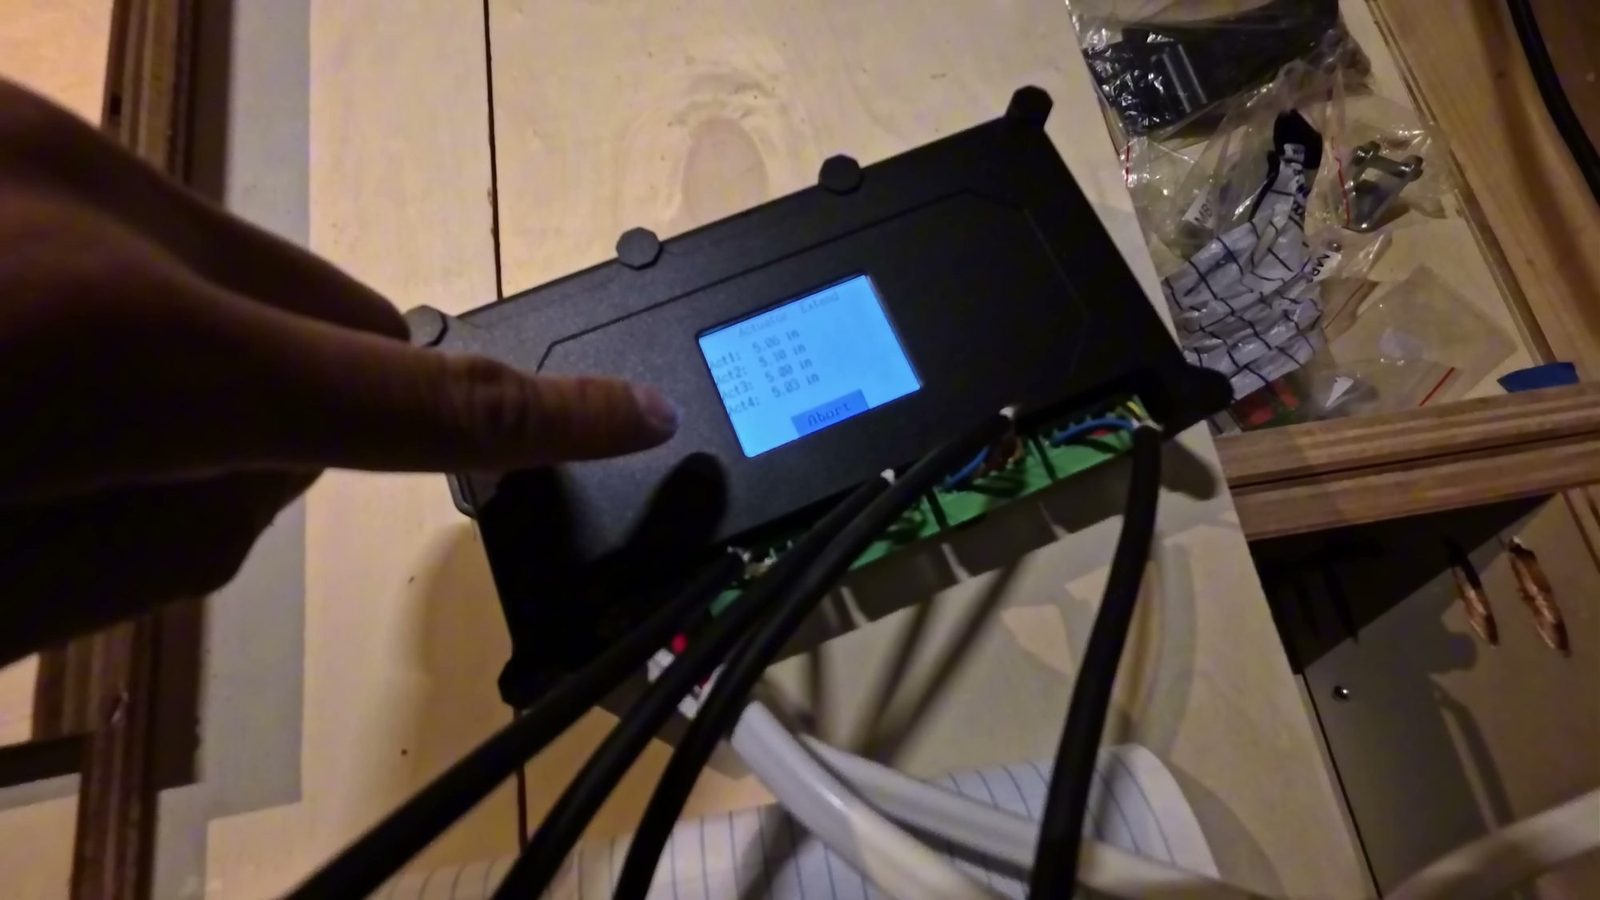 The controller shows each actuator’s length as it moves. All four stayed within about a tenth of an inch of each other.
Wiring and the first test
- Each actuator has six wires. Michael looked up on the maker’s website which color goes to which port.
- The wires that came with the actuators were too short, so we ran longer black cable to each corner and spliced them.
- The controller is powered from our 12 V system, with a fuse.
- In the controller settings, we turned feedback on (these actuators have feedback for synchronizing) and set the number of actuators to 4.
On the very first test, the screen said “system failure” and all four actuators showed as stuck. The fix was to run the calibration first. After calibrating, it moved. Up and down were also reversed on the rocker switch at first, which is an easy thing to sort out.
The controller also lets you limit how far the actuators extend and retract. Michael took his time on all of this for a simple reason: we didn’t want to be stuck in really cold weather without a bed.
Watch the wiring, calibration and first sync test
The bed frame: aluminum extrusion
The frame is 2040 aluminum extrusion on the four sides with 2020 extrusion cross beams. It’s easy to cut with a regular blade. Parts we used:
- 2040 V-slot aluminum extrusion, 2000 mm
- 2020 V-slot extrusion
- 2020 L-shape connectors and 5-hole corner plates
A few things we learned cutting and assembling it:
- Measure at the top. The Sprinter tilts in at the back, so we measured length at the top (65 in for us).
- Remember the blocks. We cut the width at 56½ in, forgot the blocks that hold the frame up, and trimmed to 55½ in.
- Load your T-nuts first. Slide the little bolts into the channel before you close the frame, and count how many each beam needs.
- Cross beams. Five in the middle plus two on the edges carry a board, then the mattress.
Attaching the frame to the rail blocks (where it went wrong)
We bolted a long aluminum angle between the two rail blocks on each side, thinking it would be more rigid than small brackets, kept within about 3 in of the side to clear the curved wall. M6 bolts go into each block. Then we lifted each side by hand and the blocks twisted and seized. Two things got us out of it:
- Let the actuators do the work. Driven by the actuators, it went up much better, because all four push at the same pace.
- Check the block adjustment screws. Each bearing block has two screws that tighten or loosen its glide. The corner that squeaked was too tight. We loosened all four and the noise went away.
Then the frame didn’t fit: the angle plus the screw heads made it about 1/4 in too wide. The next day we took it apart and shortened every cross beam.
Can the bed fall?
The actuators themselves are the hard stop. The lowest the bed can go is the actuators’ shortest length, so it can’t drop lower than that. The only way past it would be the floor giving way, and the structures on both sides are strong.
Watch the finished frame and the safety point
What it cost
The one cost we have a receipt for is the Firgelli order: four actuators, the control board, brackets and the rocker switch came to $1,129.40. That’s the biggest single cost we have a number for. On camera Michael guessed the aluminum extrusion and corner pieces at maybe around $200. The rails and the mattress were extra on top of that.
Michael’s verdict when the frame was done was that it came out a lot cheaper than buying a ready-made kit.
Closing it in: walls, ceiling and mattress
- Walls. The back walls went in as sections with a U-shaped notch for each rail block. One piece came out mirrored (a rookie mistake) and had to be recut.
- Ceiling under the bed. Oak-stained wood slats are screwed through the extrusion frame.
- Ventilation. To prevent mold under the mattress, we drilled 1 in holes on a grid every 6 in across the bed board.
- Mattress. We ordered a custom-size 4 in foam mattress from an Amazon seller who cuts it to your length, width and thickness.
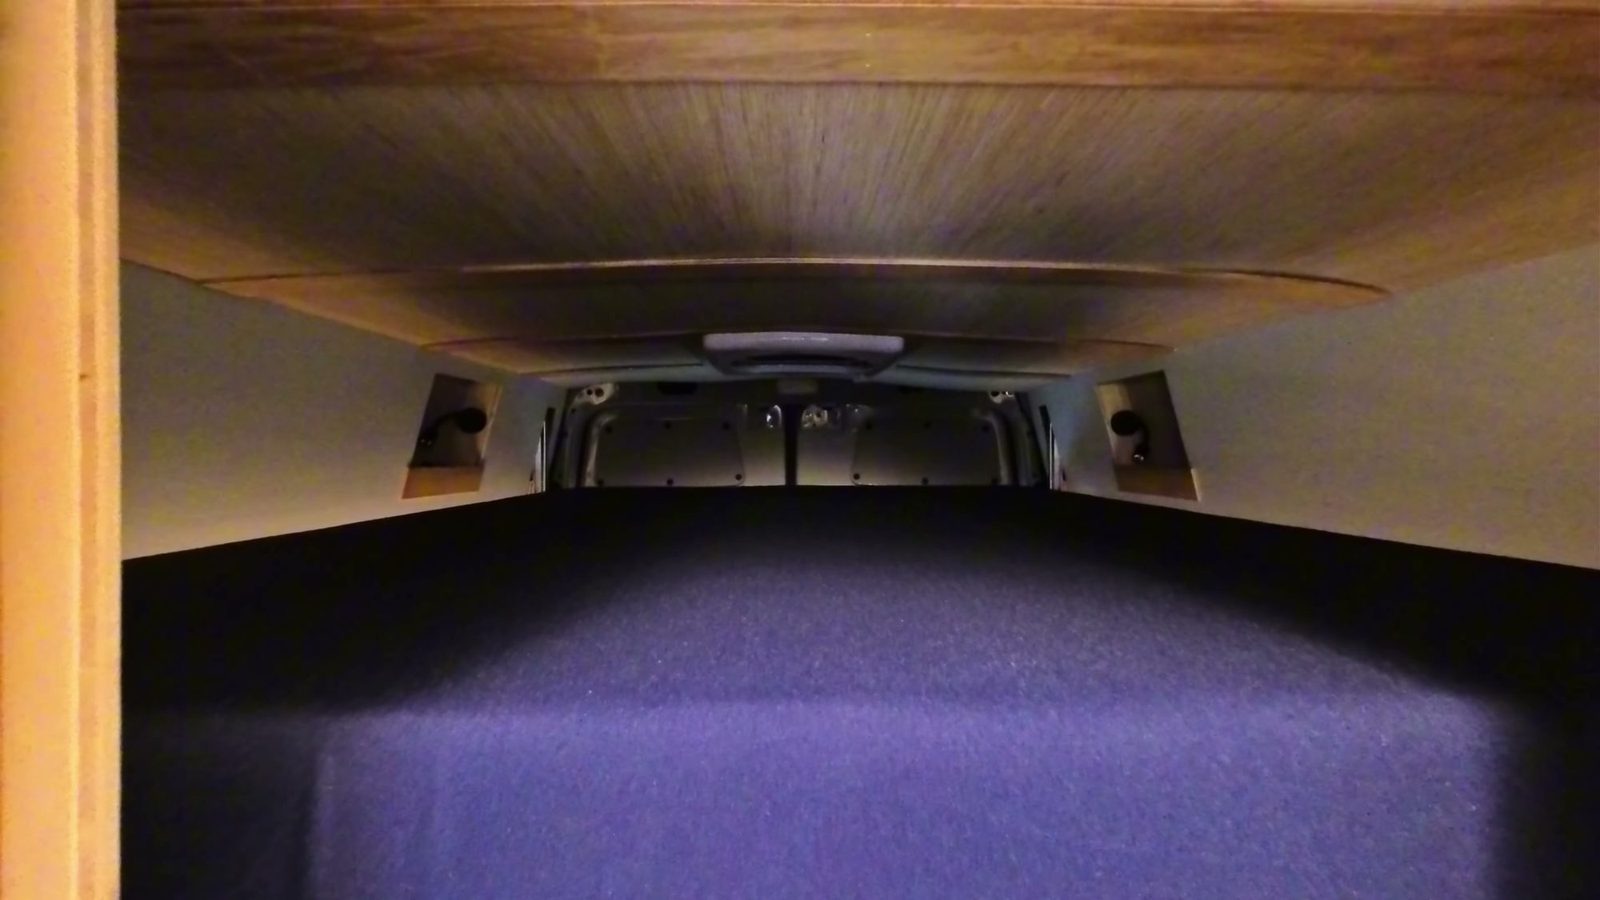 The bed raised, seen from the platform below in the finished van.
At full height Michael was about 5 in from the ceiling, shoulders touching the top, and still called it the perfect size. The mattress squishes the roof fan a little up there, so we can stop the bed about 2 in lower.
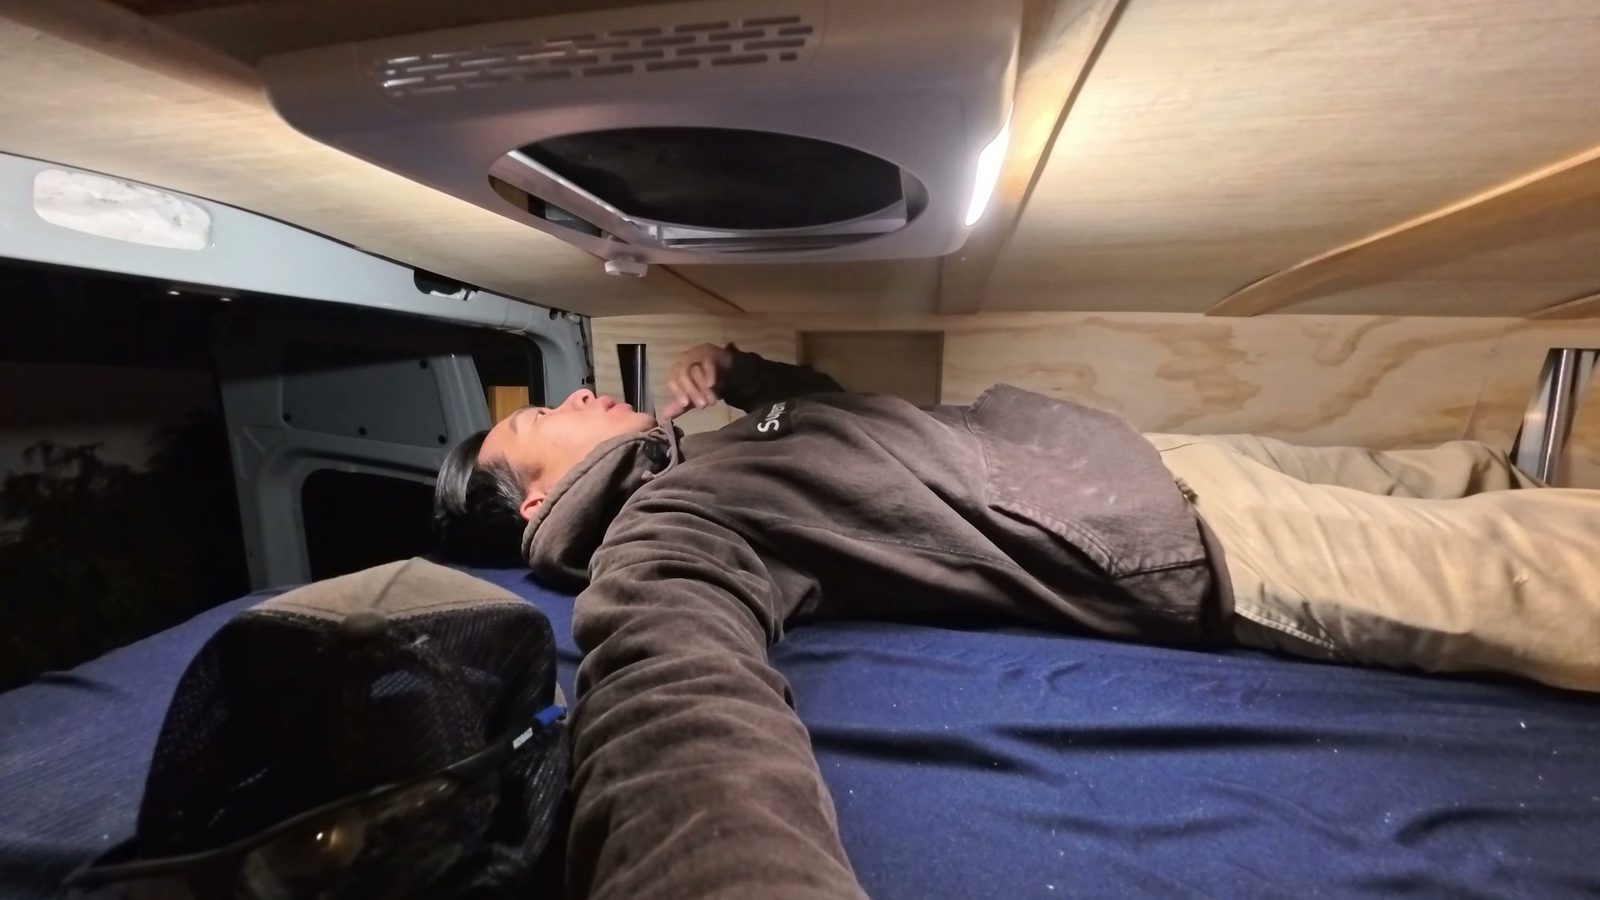 Testing the custom 4 in mattress at full height: about 5 inches to the ceiling.
Living with it
- Headroom. It’s not the most spacious bed. It fits Spencer and Michael, but it’s for sleeping, not sitting up.
- Who sleeps where. All four of us fit on the sofa bed on the platform below, so the elevator bed is for when Spencer wants to sleep by himself.
- Pillows moved out. Keeping them on the raised bed squished them and ate headroom, so pillows live in a platform cubby and blankets in a garage bin.
What we’d do differently
- Skip Unistrut. It was too heavy and too loud. Go straight to proper linear rails.
- Calibrate before your first test. It saves you the “system failure” moment.
- Plan the frame width around the hardware. Account for blocks, angle thickness and screw heads before cutting.
FAQ
How does a van elevator bed stay level?
A synchronizing controller uses the actuators’ feedback to keep all four moving at the same speed, within about a tenth of an inch on our screen. The rails keep the frame steady.
Can a DIY elevator bed fall on you?
On ours, the actuators are the hard stop: the bed can’t go lower than their shortest length unless the floor itself fails. It’s still a heavy load overhead, so build the supports strong.
What actuators did you use for your camper van elevator bed?
Four Super Duty linear actuators, 220 lb with a 22” stroke, with an actuator control board with LCD, all from Firgelli Automations. That order came to $1,129.40.
Is a DIY van lift bed cheaper than a kit?
For us, yes. The kit Michael looked at was roughly $2,000 to $3,000 by his own rough guess. Our biggest single cost was the actuator order at $1,129.40, plus extrusion, rails and the mattress.
Some links here are affiliate links: we may earn a small commission, at no extra cost to you. Details