 Rina & Michael
Our 48V Sprinter Van Electrical System (15 kWh)
By Michael · October 7, 2026
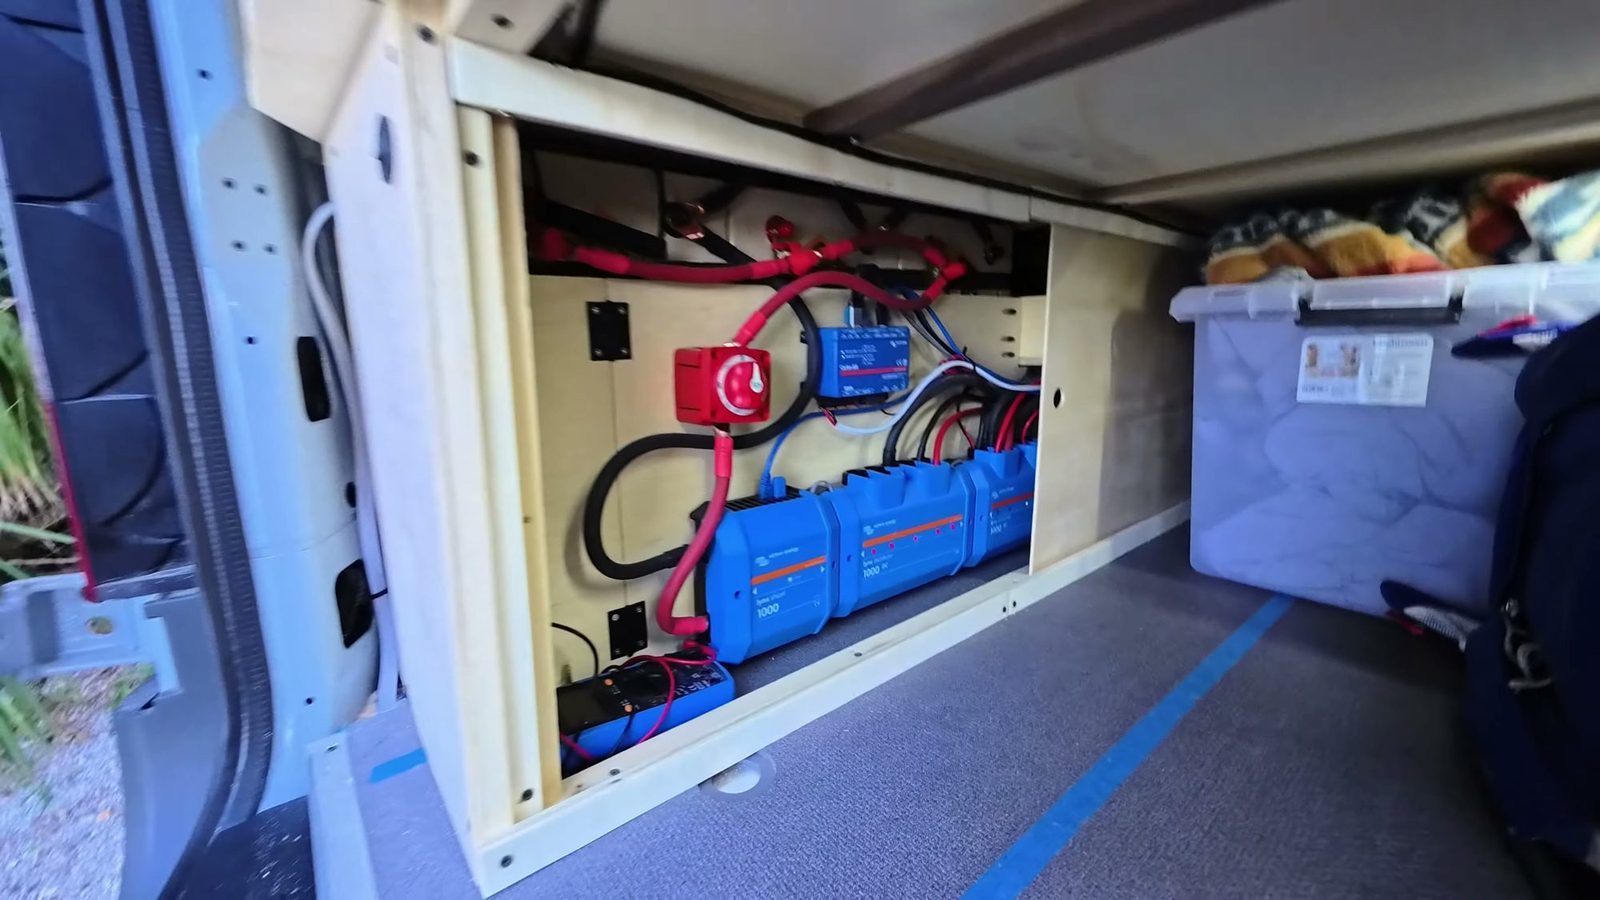
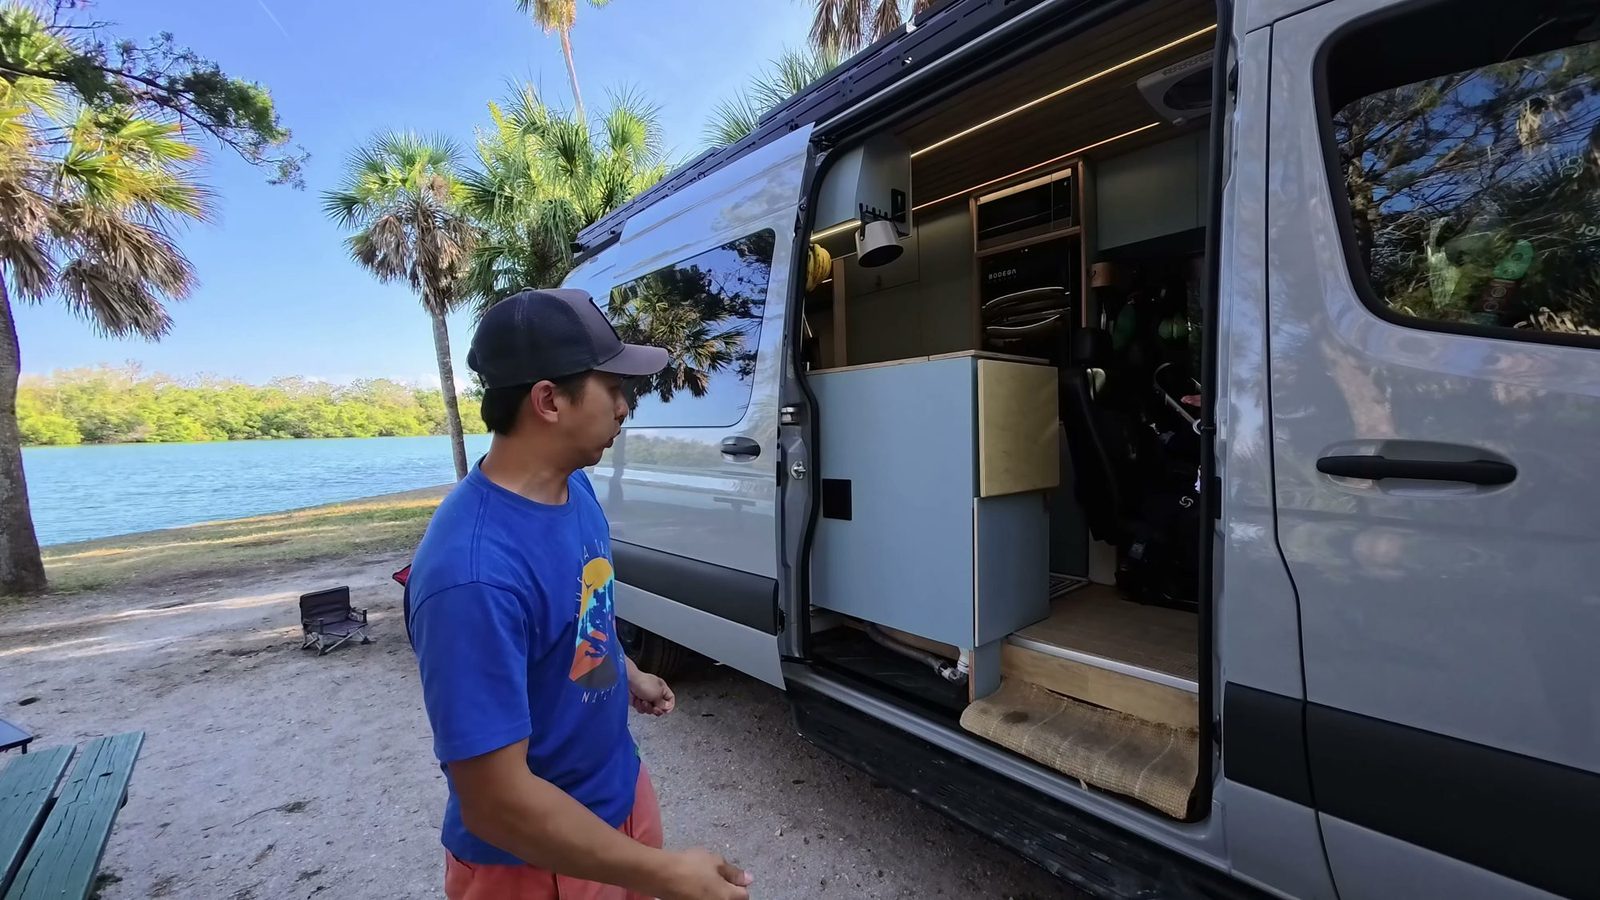
Our Sprinter van electrical system runs on 48 volts: three Power Queen 48V 100Ah batteries (more than 15,000 Wh), a wall of Victron gear, 1,000 W of solar, alternator charging and 30-amp shore power. On shore power we can run the microwave and a hair dryer at the same time, and day to day we basically don’t have to worry about power. Here’s how it’s laid out, why we went 48V instead of 12V, and what we’d do differently.
Safety: This is what we did in our own van, not professional advice. Electrical work can cause fire or injury. Consult a licensed professional before doing any of it yourself, and follow the manufacturer’s instructions for every product. Every gauge, fuse and breaker size here is something we said on camera about our build. It’s a record of what we did, not a spec for yours.
Our van is a 2024 Mercedes Sprinter 170 AWD crew van, and we built it out from summer 2025 into early 2026. If you want the full system page with every part, it lives at Our Van: Electrical.
48V vs 12V: why we went 48 volts
Our first van was 12 volts. For this one, we didn’t start at 48V either. In our planning video I said 24V, and I called 48V “a little bit of an overkill,” because at 48V the solar panels need to generate at least 48 volts before they start charging.
Two days later I worked out that the array would need about 53 volts, which meant wiring the panels in series. At that point, “48 volts is looking like a reality.” I didn’t order any 48V parts until the solar plan actually worked on paper.
Here’s why 48V won, in plain terms:
- Thinner, cheaper wires. Higher voltage means less current for the same power, so the wire doesn’t need to be as thick.
- More efficient 48V air conditioners. That turned out to matter a lot. In 2026, 48V was the only reason we could fit a powerful, low-profile rooftop AC.
If you’re weighing 48V vs 12V for your own van, one thing to know: most of our stuff in the van still runs on 12 volts, so we needed a 48V-to-12V converter too. More on that below.
The battery bank: three Power Queen 48V 100Ah
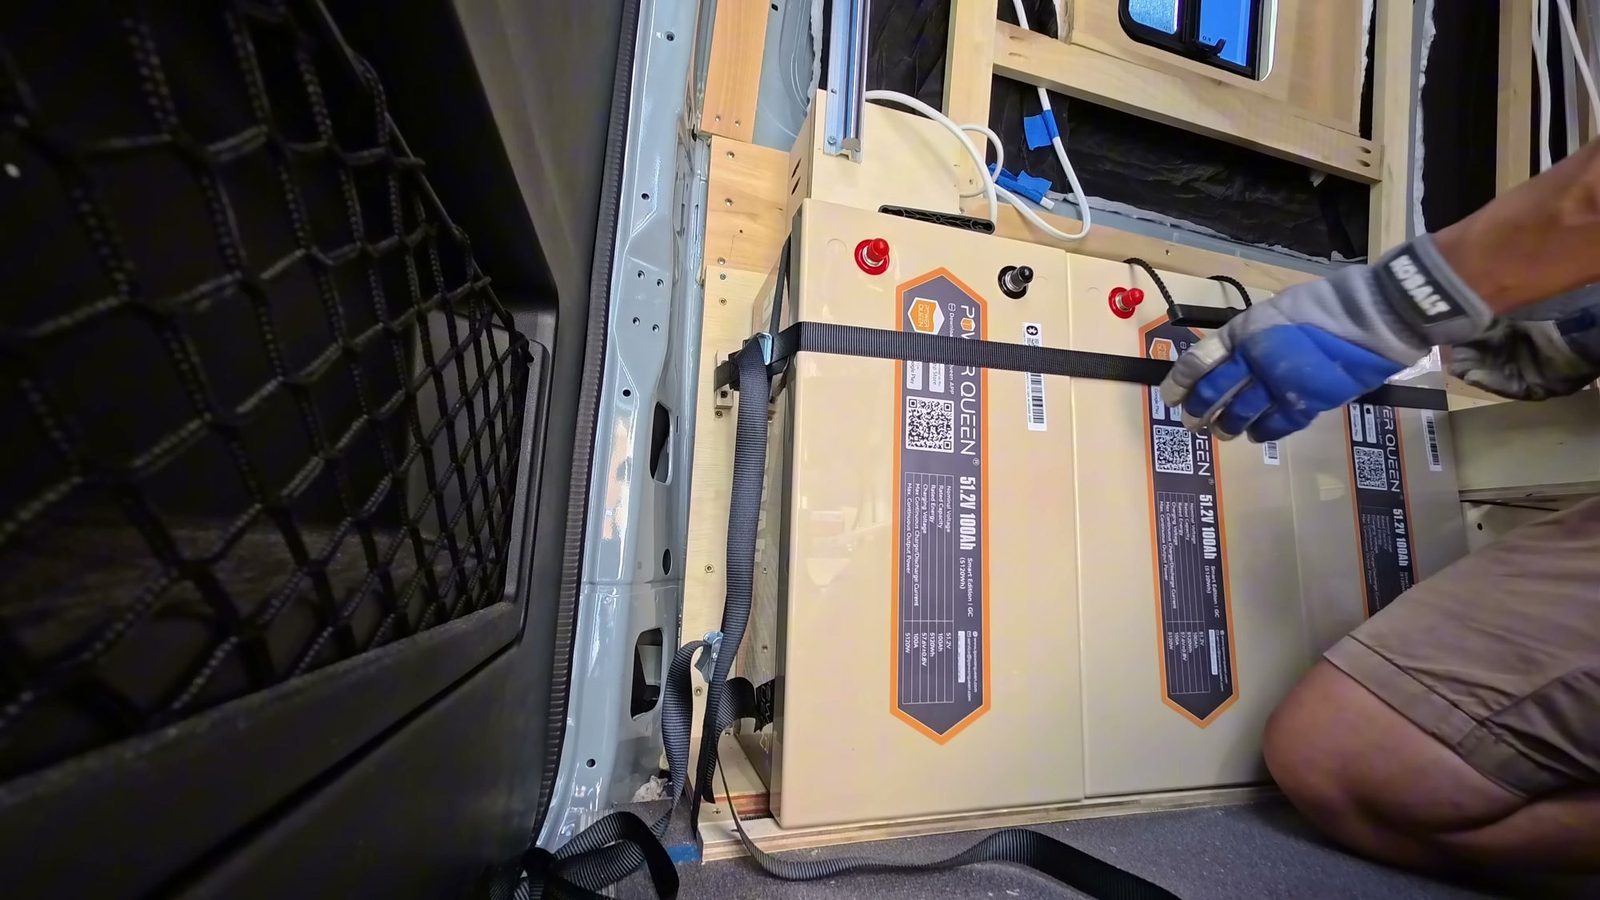 Three batteries on their side fit behind the rear wheel well, strapped so they can’t slide forward.
Three Power Queen 48V 100Ah batteries give us more than 15,000 Wh. That’s 300 Ah at 48V, or close to a 1,200 amp hour system if you think in 12V terms. Each battery weighs about 85 lbs and has Bluetooth and a low-temperature charging shutoff.
Partner note: Power Queen is our partner. They sent us one battery, and we paid for the other two. The link above is an affiliate link.
Why we picked them:
- Not a lot of brands make a 48V battery this big, and fewer batteries means fewer BMSs that can go wrong.
- Each battery was less than $1,000, for almost four times the capacity of the Dakota Lithium in our old van, which cost us $800 five years ago.
- Will Prowse had reviewed the battery and checked its BMS cutoffs.
We mounted them on their side. Each battery is about 20.4 × 10.5 × 8.6 inches. Lying flat, three would have filled the whole wall. Standing on their side with the terminals facing out, all three fit right behind the rear wheel well. Power Queen OK’d side mounting, but not mounting them on their back, because the BMS is on the front.
They sit level on a flat base with two rails and are held with cam-buckle straps so a battery won’t slide out forward. The front piece is on a hinge, so one battery can come out without taking everything apart.
▶ Watch: why 48V and why Power Queen
Tip: match the voltages before you connect them
Charge every battery to the same exact voltage before paralleling them, so there’s no imbalance. I topped off each one with a 48V smart charger, then put on high-voltage gloves and checked each with a multimeter. All three read 53.2 V before I connected them. If they don’t match, “there will be sparks.”
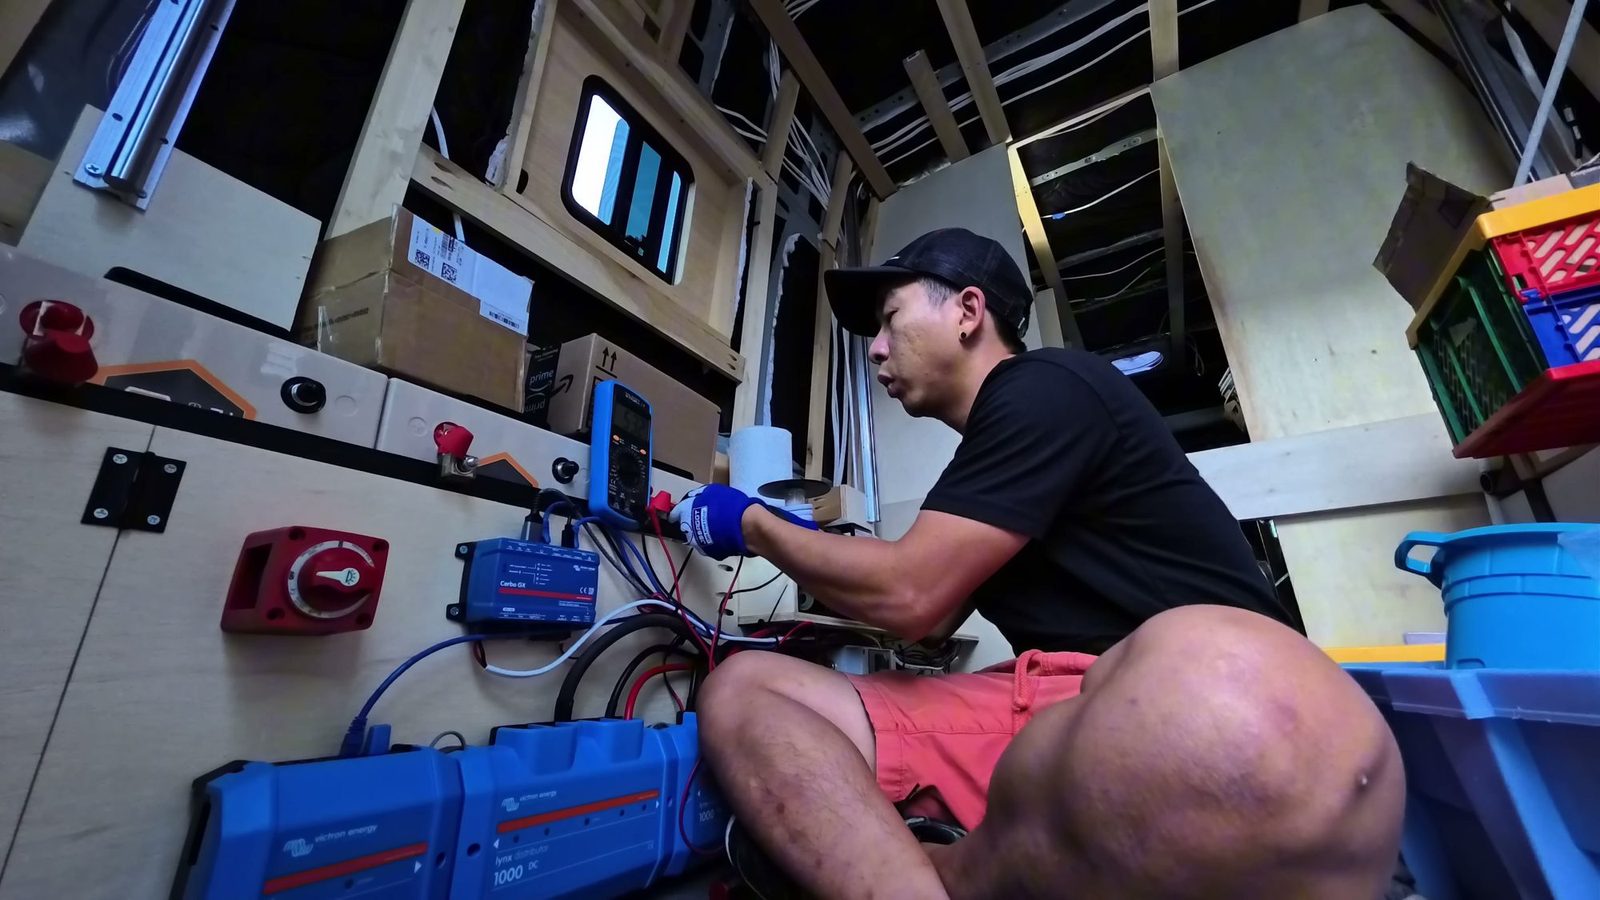 Checking each battery with a multimeter before paralleling them. All three read 53.2 V.
The Victron components
We went with all Victron products, bought from Vanlife Outfitters (no affiliate relationship there, we just bought from them).
| Component | What it does in our van |
|---|---|
| MultiPlus inverter/charger, 5,000 W | Powers all our 120V loads and charges the batteries from shore power |
| Lynx Shunt (VE.Can) | Monitors the batteries and sends the data to the touchscreen |
| Lynx Distributor ×2 | Where all the 48V devices connect, “like a smart bus bar.” Also reports blown fuses. |
| Cerbo GX | “The brains of the entire operation.” Also reads our fresh water tank sensor. |
| Touchscreen | Shows battery, water, solar and DC-DC charging |
| MPPT solar charge controller | Solar charging |
| Isolated 48V-to-12V converter | Most of our stuff runs off 12 volts |
| DC-DC chargers ×2 | Charging from the alternator, in parallel |
Get our complete van build parts list (free PDF)
Every part we kept in our Sprinter build, system by system, with links. Plus a short email series on how each system works.
No spam, unsubscribe anytime. Privacy.
How it’s wired, at a high level
People search for a “Sprinter van electrical system diagram,” so here’s the closest thing we can give you. This is only what I showed or said on camera. It is not a wiring diagram, and it skips the fuse and breaker sizes we haven’t confirmed in writing.
- Layout. Batteries on their side behind the rear wheel well. Inverter above the wheel well. The other Victron units on a board in front of the batteries. All the electrical gear is on one side of the garage, all the water gear on the other.
- Battery bank. The three batteries are paralleled positive-to-positive and negative-to-negative, with a terminal fuse on each positive.
- Main positive. Battery bank → isolator switch → Lynx Shunt. The main negative goes straight to the shunt.
- Lynx panel. The shunt and both distributors bolt together into one panel. Our distributors are mounted upside down, so negatives are on top and positives on the bottom, with a mega fuse on each output.
- Inverter. The MultiPlus DC cables go to the Lynx. AC in comes from the shore power inlet. AC out 1 feeds our 120V breaker box.
- MPPT and 48V-to-12V converter connect to the Lynx.
- DC-DC chargers are protected by DC breakers, and their input runs to the starter battery under the driver’s seat.
- 12V side. The converter’s output runs up to two 12V fuse blocks by the upper cabinets.
- 2026 addition. The 48V rooftop AC is fed from the 48V distributor through a fuse, using a port I left free in 2025.
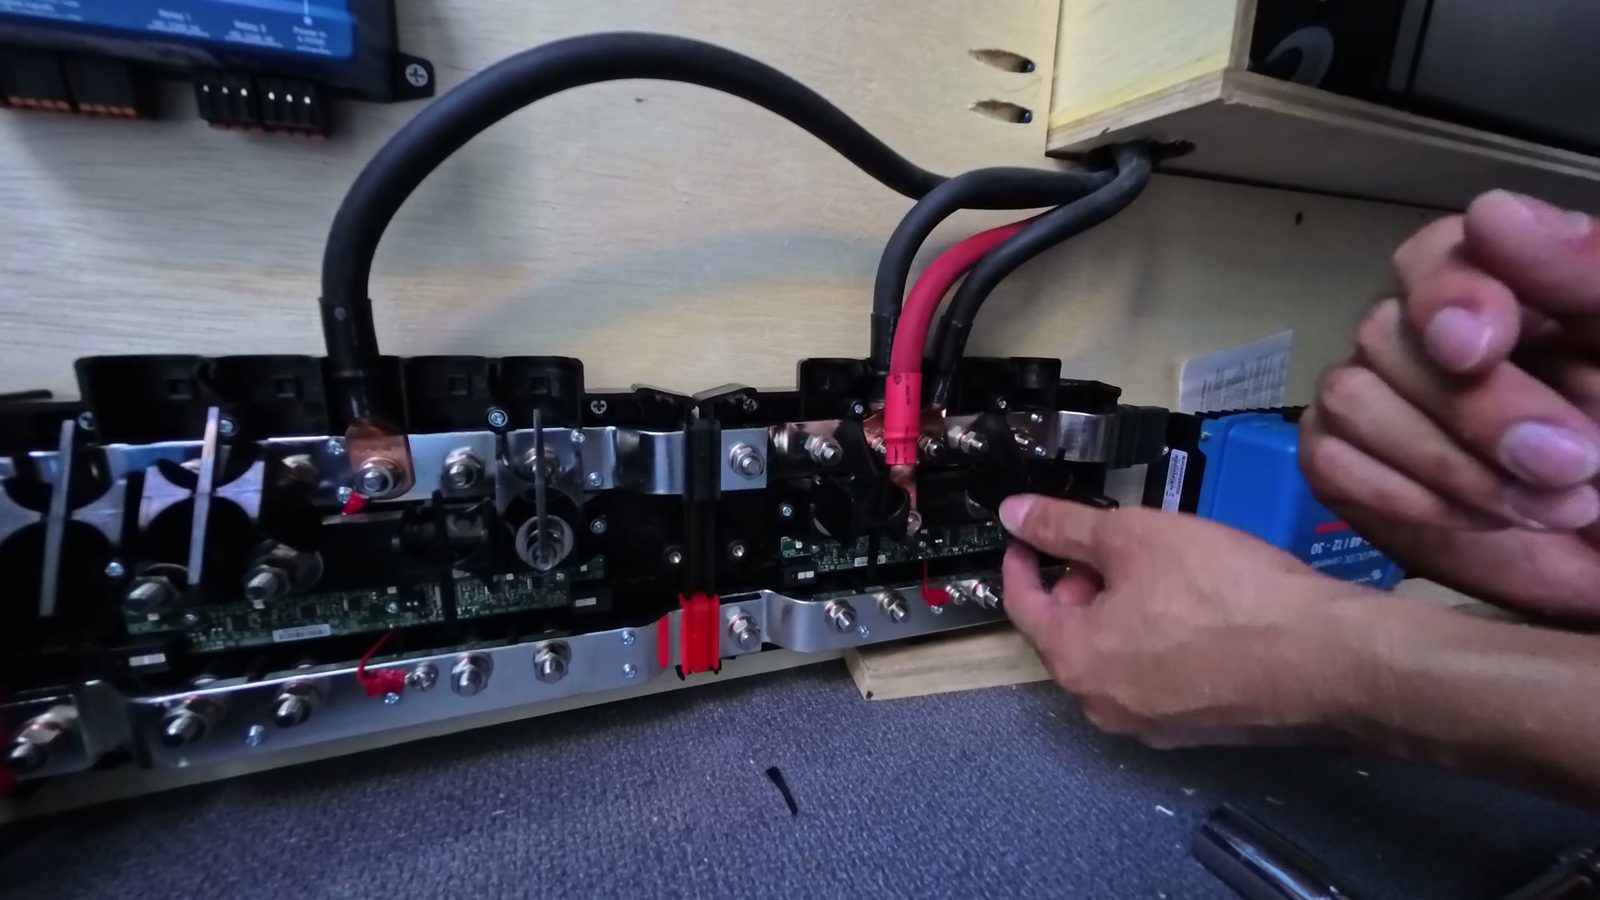 The Lynx panel: the shunt and two distributors bolted together, with the first heavy cables going on.
Protection: fuses, breakers and the battery switch
A fuse on every battery. It might be “a little bit of an overkill,” but on a 48V system I wanted each battery protected on its own. We used Blue Sea MRBF terminal fuse blocks on the battery terminals.
A main switch. The Blue Sea battery switch is the main switch I turn off before working on the system. I had to drill out the lug hole to fit.
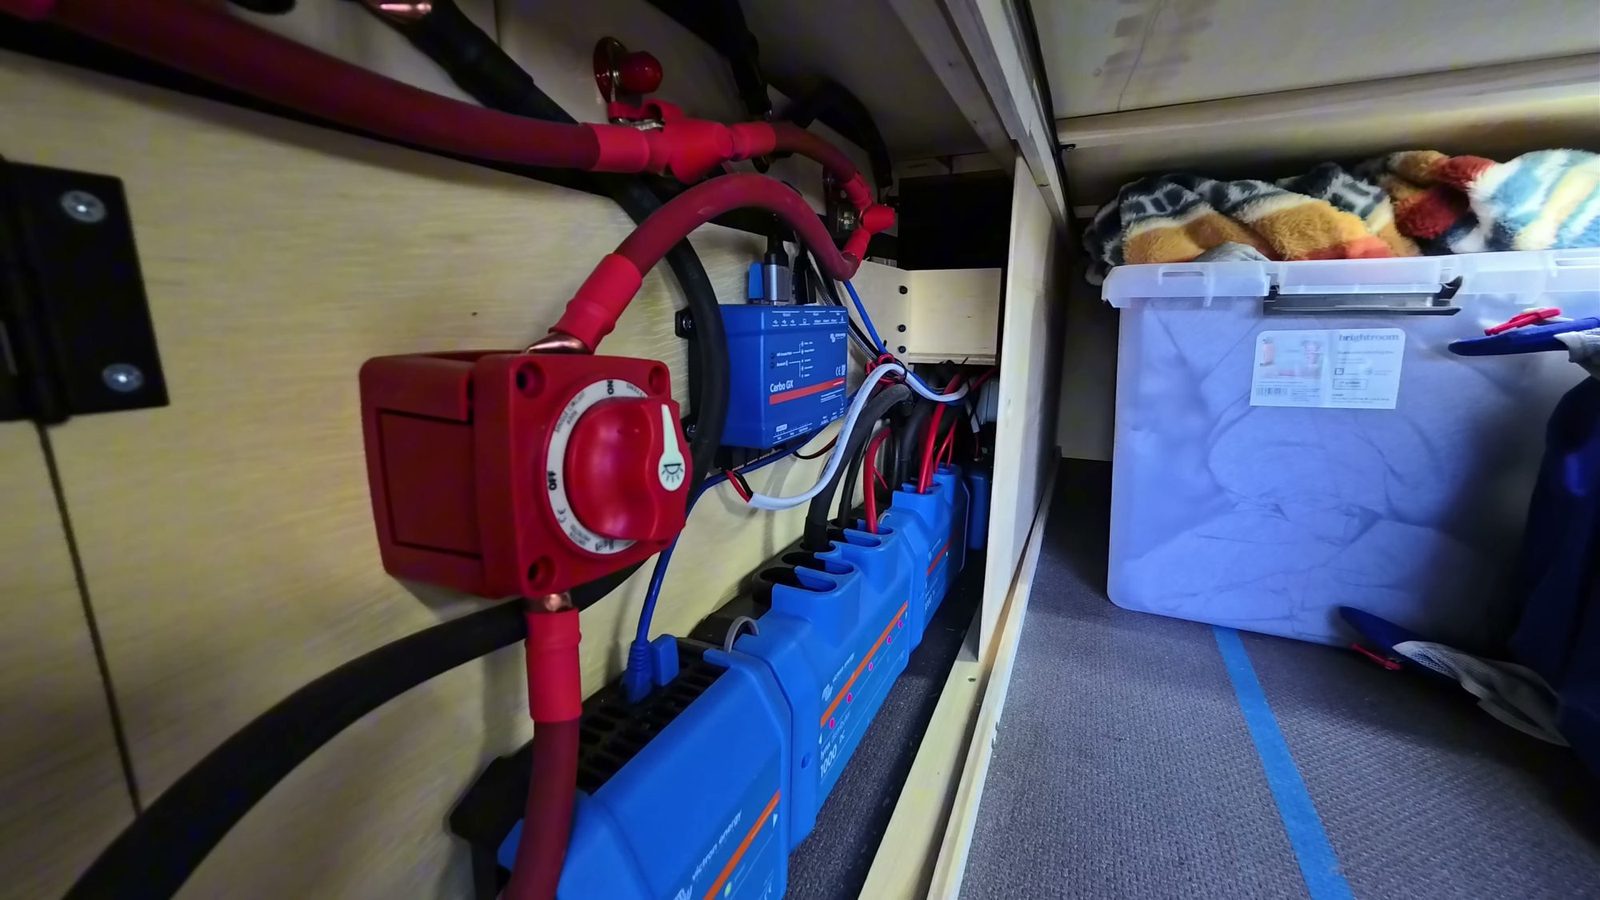 The main isolator switch (red) and the Cerbo GX, the brains of the system.
The 48V fuse problem. This one surprised me. The smallest Lynx fuse is about 50 amps, so it protects the wire, not the device. I wanted 15 A for the DC-DC chargers and 20 A for the converter, so I used DC breakers for those instead.
Ground before the walls close. My note to myself in the planning stage was “Add ground before closing the walls.” I ran about 1.5 feet of 2/0 cable to bare metal on the van frame, with the paint scraped off, a stainless bolt, lock and toothed washers, all cleaned with alcohol.
Charging: solar, alternator and shore power
Solar. 1,000 W on the roof into one MPPT. Solar is a whole story of its own, so it gets its own page.
Alternator. We skipped a second alternator. Each DC-DC charger only brings in 8 amps on the 48V side, about 384 W. Two of them is 768 W, which is still under what a stock starter alternator can provide. The wiring is 12 gauge on the 48V side and 10 gauge to the starter battery.
Shore power. Our old van had a 15-amp cord running through the door. This van can charge at up to 30 amps, which is more than 3,000 watts. The 30A inlet sits low and discreet above the water inlet, which is nice for stealth camping, and 10/3 cable runs from it to the inverter.
The 120V side
AC out 1 on the MultiPlus feeds a waterproof six-circuit breaker box through a 5-foot, 6-gauge 6/3 cable. Inside, a 50A main feeds three 20A breakers:
- the water heater’s electric element
- the kitchen and dishwasher
- the microwave, plus the front and closet outlets
Two things caught me out here:
- The DIN rail doesn’t connect the breakers. I thought the rail itself would carry power. It doesn’t. I had to jumper the main to each breaker.
- AC out 2 is the wrong output for this. I first wired the panel there, but AC out 2 is for loads you only want on when you’re plugged in. I moved it to AC out 1.
The water heater outlet has a lighted switch, because we only need the electric element when we’re on shore power. It drew about 775 W in testing. For outlets, stranded marine wire doesn’t sit well on screw terminals, so I used GFCI outlets where you just insert the wire and lock it down. They’re about $17 each versus about $4 for a basic outlet.
The 12V side
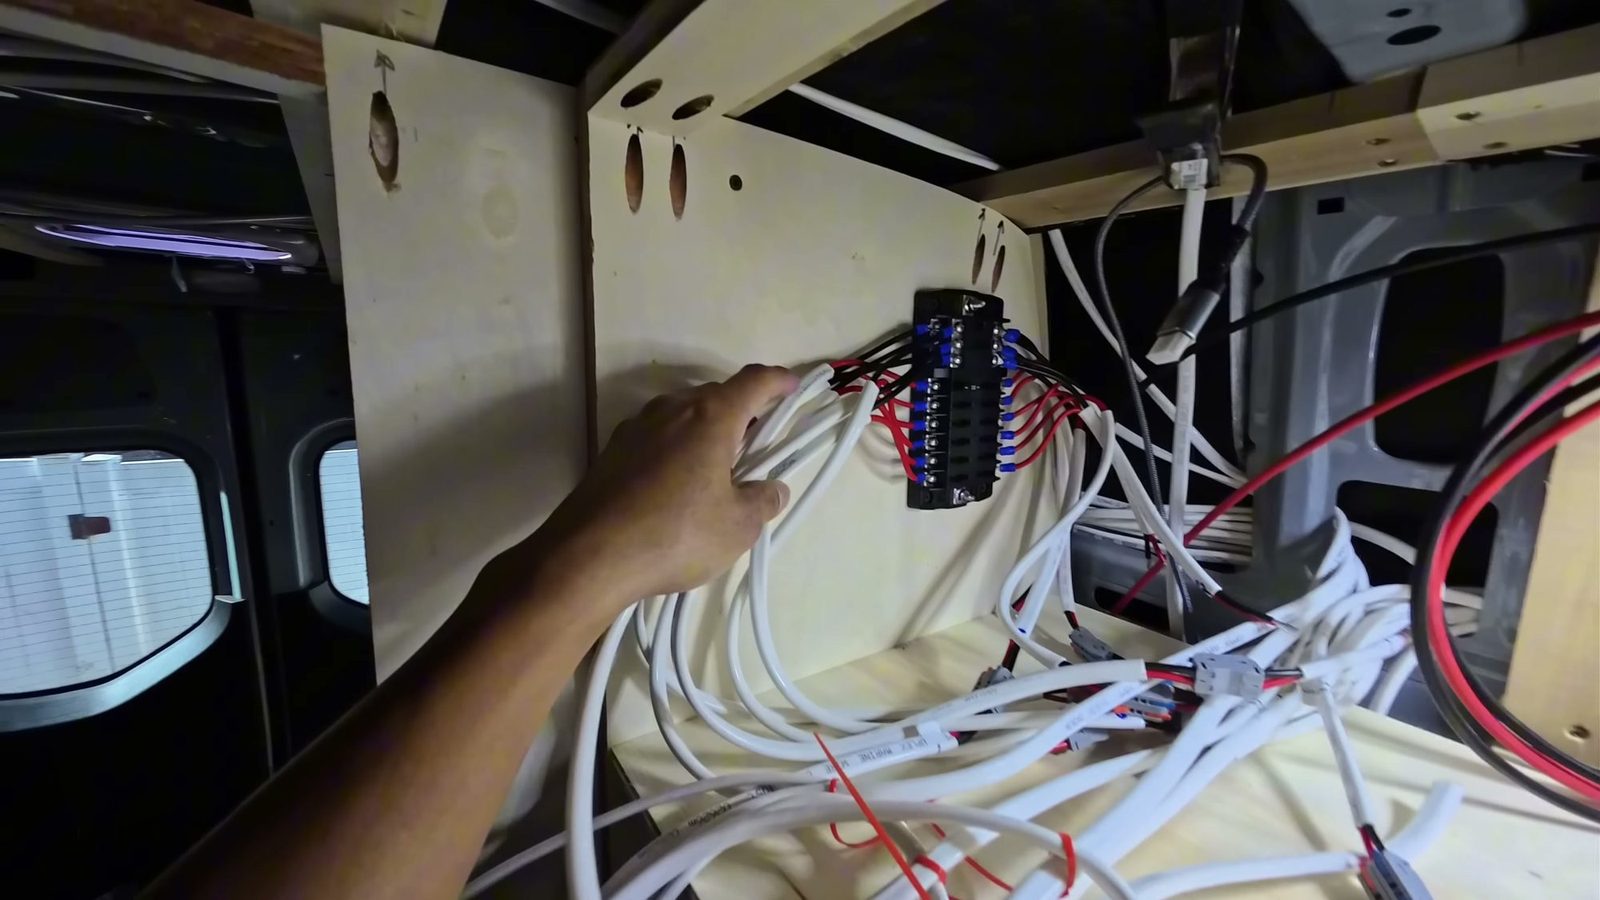 One of the two 12V fuse blocks, with pigtails crimped outside the cubby and then connected.
- Two 12V fuse blocks live behind the panel wall above the closet.
- Switch panel. A five-gang switch panel runs the water pump and the gray water valve. Two of its switches were meant for a solar tilt and never got used.
For wire, we used marine-grade wire everywhere because of the double jacket in a vibrating van: 2/0 for the battery bank, shunt and inverter; 6 gauge for the MPPT and converter; 10-gauge triplex for 120V; 12 gauge for 12V loads and 14 gauge for lights. Battery interconnects and the runs to the shunt and inverter are all exactly the same length. And label both ends of every wire. Our label maker cost about 20 bucks and was worth every cent.
What it cost
We can only share what we’ve confirmed. Each Power Queen battery was less than $1,000, and we paid for two of the three. The GFCI outlets were about $17 each and the label maker about $20. We haven’t added up the Victron gear, wire, fuses and breakers yet, so we’re not going to guess at a total. The full list of what we bought is on our parts list.
How it’s held up
We first powered it on October 7, 2025, then added things one at a time. By our March 2026 van tour, the system had been working well for us. In June 2026 the new rooftop AC drew about 300–400 W on low and about 800 W at 89°F.
What we’d do differently
- Don’t oversize outlet wire. A lot of our 10-gauge wires didn’t fit in the outlets. Lesson learned.
- Run long wires early. The DC-DC run to the starter battery would have been a lot easier before everything else went in.
- Check that ring terminals fit the studs. Ours needed drilling for the Lynx.
- See big parts in person. The inverter was smaller in my head.
- Watch for voltage drop on long, thin runs. Our heater pump only ran once I shortened its wire.
- Plan every load before the walls close. If you’re missing a cable after the walls go up, it’s a real pain.
FAQ
Is 48V worth it in a Sprinter van?
For us, yes. It meant thinner, cheaper wires, three big batteries instead of many small ones, and it’s the only reason we could fit a powerful low-profile 48V rooftop AC. The catch is that most small stuff still runs on 12V, so you need a 48V-to-12V converter and a 12V fuse block side.
How much battery do you have?
Three Power Queen 48V 100Ah batteries, which is more than 15,000 Wh. That’s close to a 1,200 Ah system in 12V terms.
Do you need a second alternator for 48V?
We skipped it. Two DC-DC chargers in parallel bring in about 768 W total, which is still under what a stock starter alternator can provide.
Is there a full wiring diagram?
No. We’re sharing the layout and the order things connect in, but not a wiring diagram. Please have a licensed professional check any design before you build it.
Some links here are affiliate links: we may earn a small commission, at no extra cost to you. Details