 Rina & Michael
Our Family Camper Van Build: A Sprinter for Four
By Michael · October 7, 2026
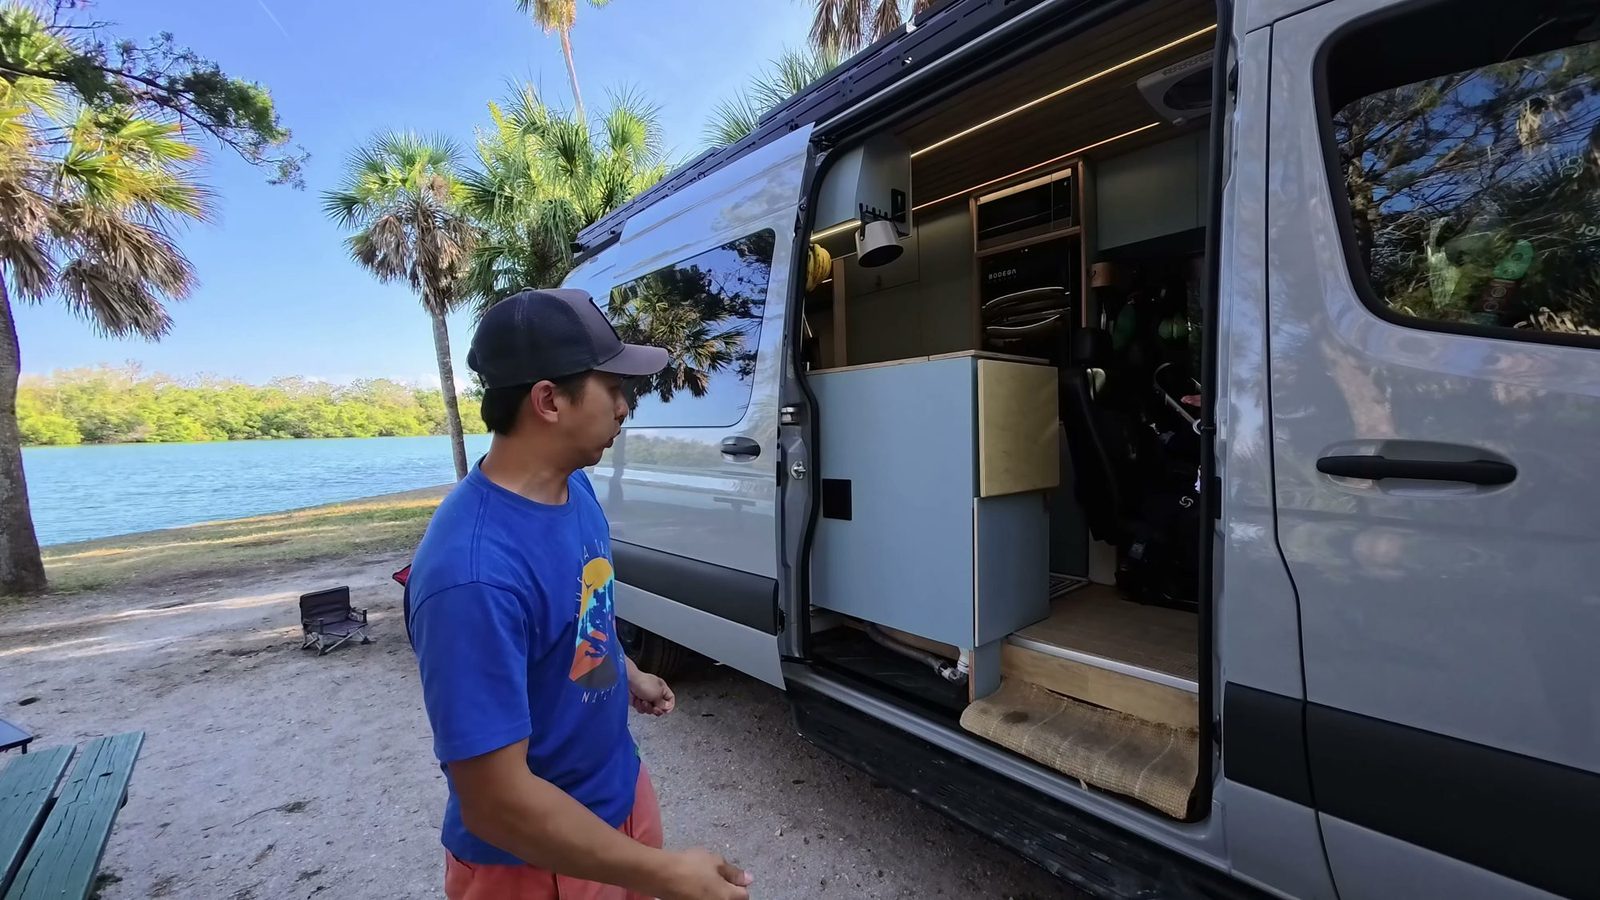
We built our second van, a 2024 Mercedes Sprinter 170 AWD crew van, into a full-time home for our family of four. It has seats for four, a hallway kitchen up front, a sliding privacy door, and a raised play platform in the back with an elevator bed above and a big storage garage below. Here’s how we designed it around two little boys, and how it’s working now that we actually live in it.
Why we needed a new van
We’re Michael and Rina. We traveled in our first van for five years, but it only seated three. With a second baby on the way, we needed a van that seats four, so we built this one.
We built most of it in the driveway and garage at Michael’s parents’ place in New York, starting July 23, 2025, and filmed it day by day for our vlog. Spencer “helped” the whole way, and Rina was pregnant with Archie for the whole build. As Michael put it: “things take probably triple the amount of time with Spencer.”
We wanted to finish before the baby arrived. On the last work day before Archie was born in October 2025, Michael was “like 85 90% done.” The rest got finished with a newborn, and by February 2026 we were on the road in Florida.
If you want to see the finished result first, here’s our full family van tour.
Start with a test night in the empty van
Before we touched a single tool, we spent a night stealth camping in New York City in the empty van. We brought a mattress topper, a water jug, the fridge and a couple of buckets. The point was to remind ourselves what actually matters.
The next morning we wrote down what we’d learned:
- Insulation is a must. With none, you can hear people talking on the street.
- Two fans are necessary. Heat from cooking made the back stuffy.
- Window covers matter. Our foil covers were slow to put up, and one flapped all night.
- Air conditioning and counter space are must-haves for us to live in a van comfortably.
- A table for four and a real sink.
If you’re planning a van build with kids, this is our number one tip.
Seating for four: the seat swap
Four seats is the whole reason this van exists, so the seats were the very first job.
The van came with the Mercedes three-seat bench in the back, and it extends way out into the van. We swapped it for a two-seat Ford Transit bench, which freed up a lot of room to build. With the passenger seat on a swivel base, “now we can seat four comfortably.” There’s also storage for snacks and tools under the crew seat.
The Ford Transit rails don’t line up with the Sprinter’s factory bolt holes, so we had to come up with our own way to mount them. We’re deliberately not sharing those mounting details or any car seat setup here, because we haven’t had them professionally checked.
Safety: This is what we did in our own van, not professional advice. Seats and car seats are life-safety parts. Always follow your car seat’s and your vehicle’s manuals, and consult a licensed professional before you change or mount any seat in a vehicle.
The front passenger seat sits on an RV passenger seat swivel base from Amazon (affiliate link).
The big idea: a play platform with an elevator bed
This is the part of our family camper van build we get asked about most. On Spencer’s whiteboard, Michael drew the back of the van as three layers:
- The middle: a raised, flat platform for playing, and for eating Japanese-style on floor cushions.
- Above it: an elevator bed that stays up by day and comes down at night.
- Below it: the garage, for the water tank, batteries, bikes and toys.
You can watch Michael sketch it out on the whiteboard here.
 The raised play platform in the back. The elevator bed sits up in the ceiling above it.
Why not a dinette? With benches around a table, your feet need the space in the middle, so you lose the storage underneath. A flat platform gives “the best of both worlds where you have a ton of storage.” Michael hadn’t seen anybody build a play area for kids like this.
It’s also the boys’ favourite part. Spencer’s favourite thing in the whole van is walking along the platform. His one-word review: “Balancing.”
Get our complete van build parts list (free PDF)
Every part we kept in our Sprinter build, system by system, with links. Plus a short email series on how each system works.
No spam, unsubscribe anytime. Privacy.
Sleeping four in a camper van
The original plan was for Michael and Rina to sleep in the elevator bed with Spencer below. Real life went differently.
By the time we filmed the tour, all four of us were sleeping on a floor couch on the platform that converts into a full-size bed, and all four of us actually fit in it. The elevator bed is waiting for when Spencer wants his own bed.
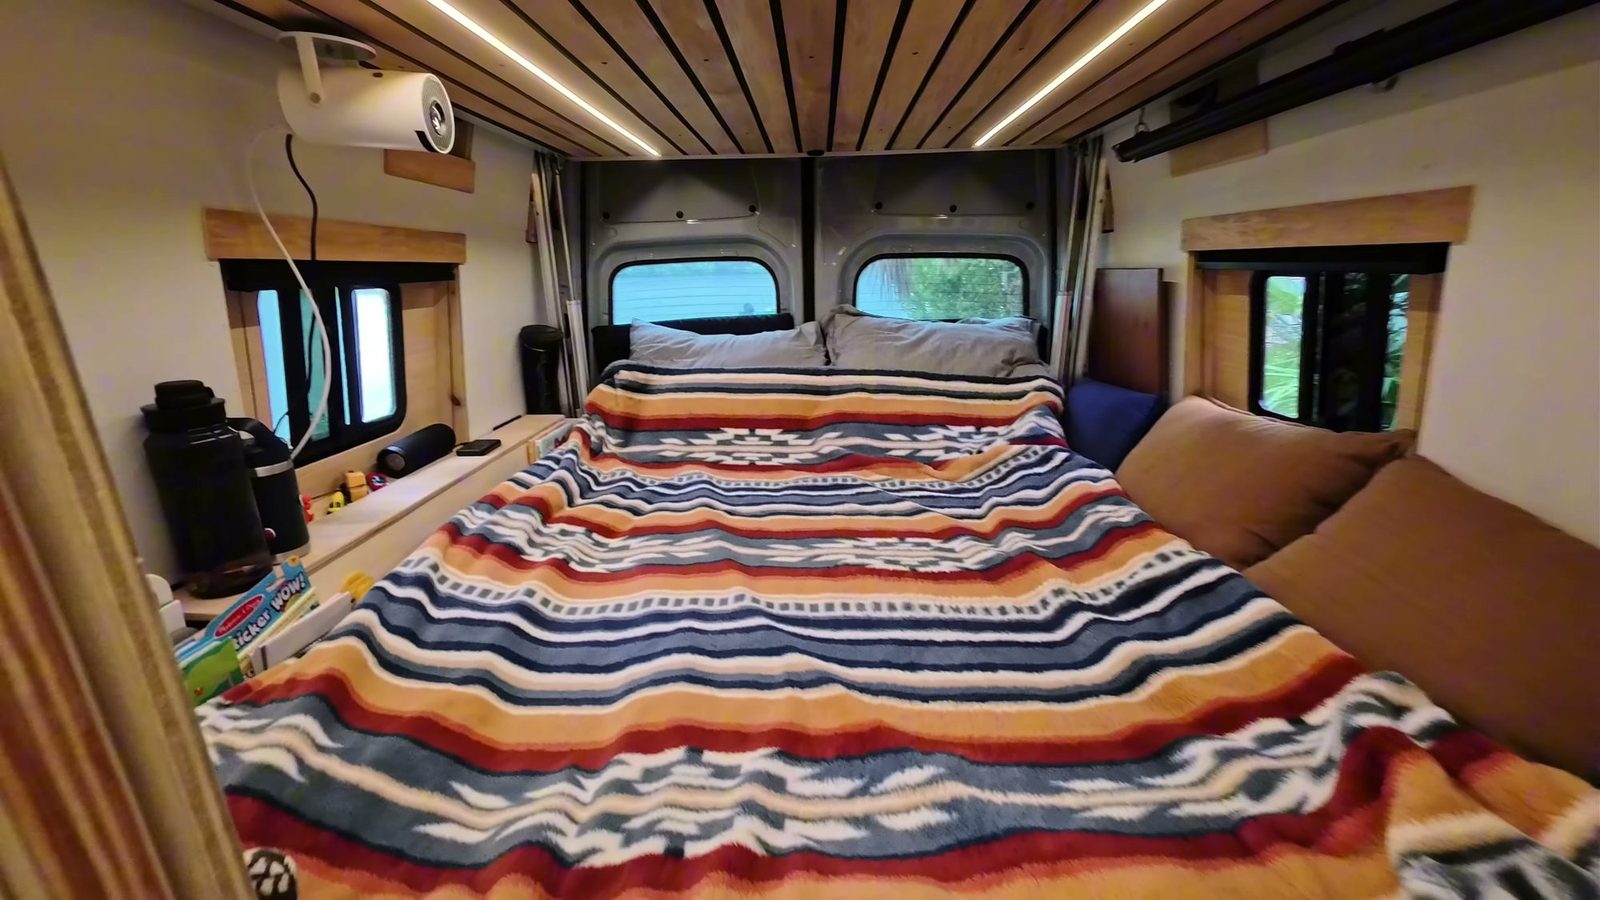 Plan vs reality: the sofa unfolds into a full-size bed that all four of us fit in.
Our honest verdict on the elevator bed: “It’s not the most spacious bed area. It will sleep Spencer.” Michael fits up there too. It runs on linear actuators and rails, controlled from a switch on the panel. We built it ourselves, and it came out a lot cheaper than buying a Happy Jack kit.
Two things we changed after moving in:
- Bedding storage. We stopped storing pillows and blankets in the raised bed, because they squished it down and left even less headroom. They moved to a cubby and the garage.
- A step. In January 2026 we added a slide-out step on a locking drawer slide, because the platform was a little too high to climb into. A small garage door covers it.
The full bed build is on our elevator bed page, and the rest of our sleeping and kid setup is in Van Life with Kids.
Storage: every item gets a spot
After five years in our first van, we knew storage is one of the most important things for us, especially with two kids. The design goal was simple: every item we bring with us should have a dedicated spot.
Under the platform. The platform is full of lidded cubbies, plus a back locker. Lift the rug and the whole platform is storage. In our first van Spencer’s toys were everywhere. Now they live under the floor he plays on.
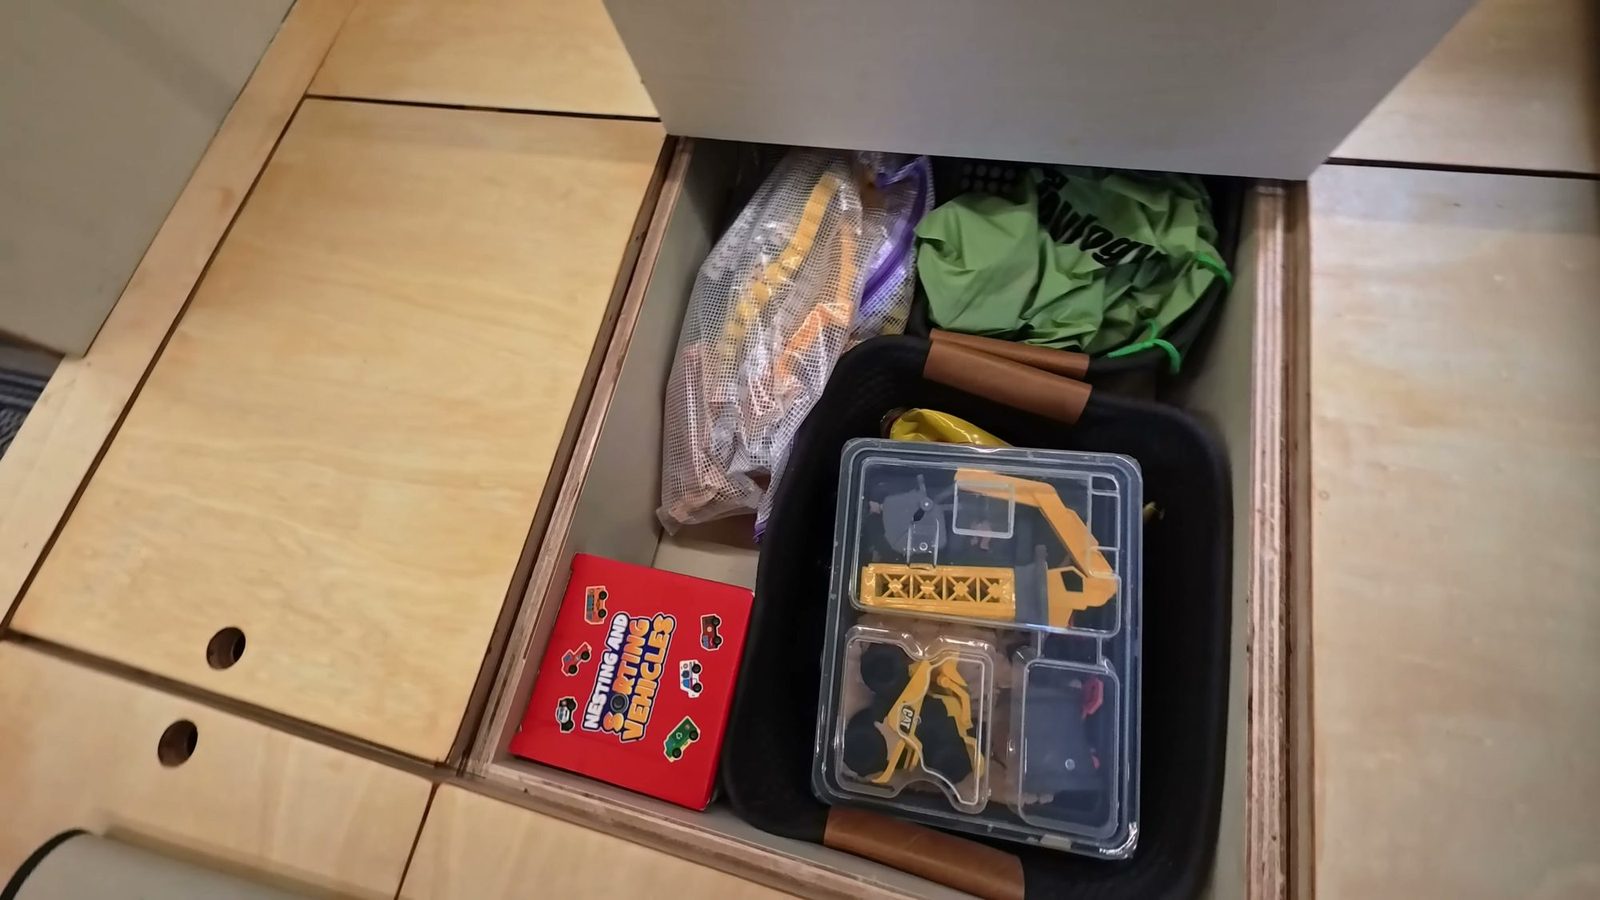 Lift a lid and the toys are right there, under the floor the boys play on.
One side electrical, one side water. The back is split three ways: electrical on one side, water on the other, garage storage in the middle. Michael’s rule: fit the necessary things first, and whatever is left is your usable space.
The closet. Instead of building wooden drawers like in our old van, we used mesh baskets on rails. They’re lighter than wood, much quicker than building drawers, and cheaper: $10 per basket and $5 per rail. Each of us has a closet section now, and we’re happy with them. For the boys’ clothes we did a mix of pull-out drawers and open cubbies, since baby things are easier to browse in a drawer.
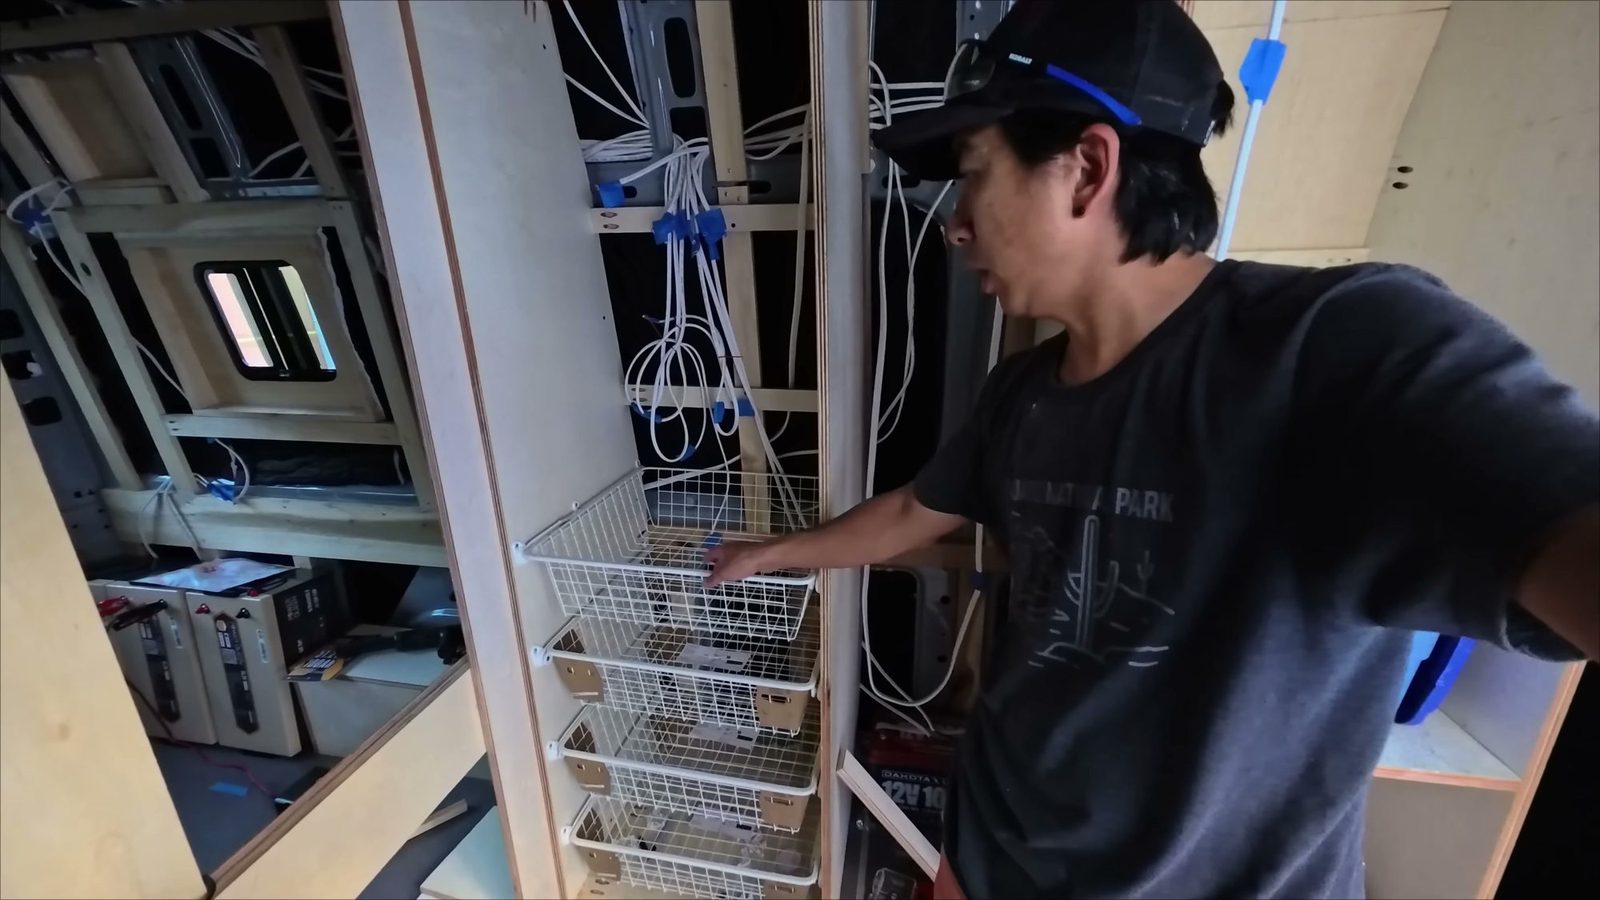 Mesh baskets in the closet: lighter than wood drawers and much quicker to build.
Upper cabinets. The cab uppers hold the boys’ diapers and wipes. The kitchen uppers hold toiletries and dishes.
Doors over drawers. Our first van taught us that drawers with just a latch fly open on the road. So our drawers sit behind doors with magnetic locks, and nothing goes anywhere, not even the heavy pots-and-pans drawer.
All the cabinets are plywood boxes we cut ourselves, mostly in our yard. The full cabinet build, including how we fit cabinets to the curved Sprinter wall, is on our cabinets and interior page.
The kitchen, in brief
Michael does most of the cooking in our family, so the kitchen mattered a lot. It runs along the passenger side by the sliding door, and we extended the counter into a hallway so it wouldn’t be much shorter. It’s a little tight, but we “are not too big.”
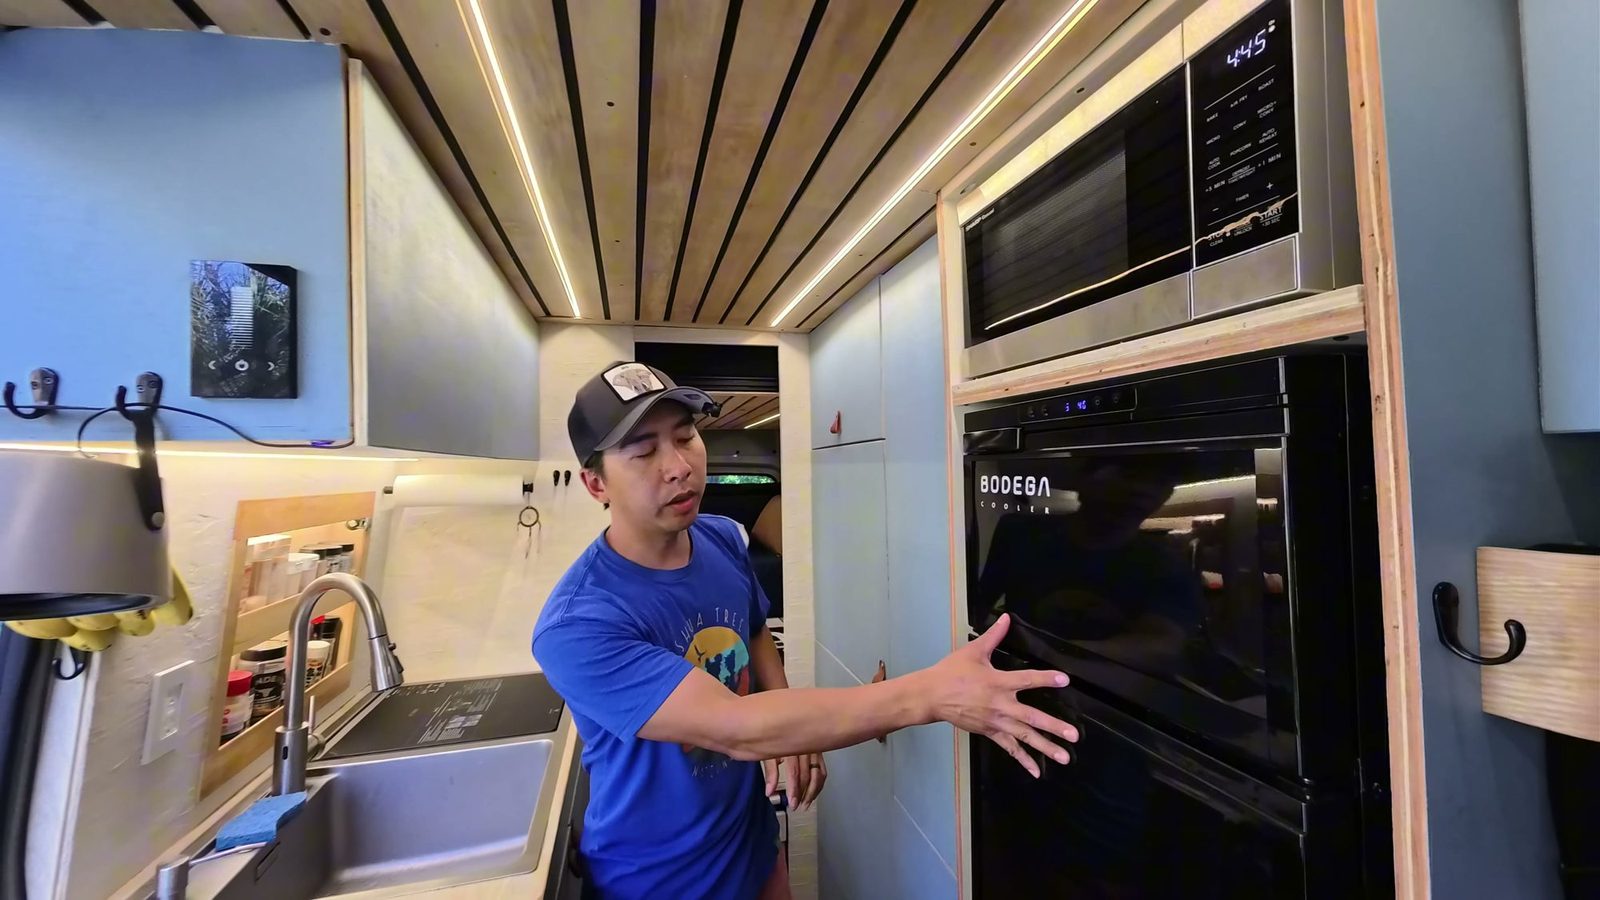 The hallway kitchen: sink and stove on one side, the upright fridge and microwave on the other.
- Propane stove and oven. We can run all three burners at once and cook as much as we want.
- A built-in dishwasher. It’s Michael’s favourite part of the entire build. With two kids, it means we don’t wash dishes as often, and on the delicate cycle it uses only 3 gallons of water. When it isn’t washing, it’s a second sink and a drying rack you can drive with.
- An upright fridge. Our first van had a chest fridge, which meant playing Tetris every time. The Bodega Cooler upright fridge/freezer is easier to get into, and the big freezer holds our Asian-supermarket stock-ups. Bodega sent us this fridge, and that’s an affiliate link.
After moving in we added a portable exhaust fan by the stove and a pop-up countertop extension for more prep space. More on our kitchen page.
The sliding privacy door
A sliding door separates the living area in the back from the kitchen up front. With two kids, this ended up being one of the most useful things we built.
In the old van, Michael took early work calls by sneaking all the way to the front. Now the kids can nap or sleep in the back while he closes the door and takes calls or works without waking them. Cooking smells stay in the kitchen too.
It holds heat as well. In winter, the back warms up super quickly with the door closed. You can see it in this video.
The toilet, and the shower we scrapped
We kept the toilet simple this time: a pull-out spot with a bag and cat litter. In our first van we paid about $1,000 for a dry-flush toilet and never used the dry-flush function. This one is super easy and works great for us.
The shower didn’t go to plan. We built an epoxy shower box where the kids could take a bath, but the epoxy never cured properly, probably because it sat outside in 50 to 60 degree weather. In August 2026 we scrapped it. The plumbing there gets too cold in winter, so the new plan is a shower head on a line from the kitchen faucet, a doggy pool to catch the water and a curtain. We don’t shower every day, so we don’t need a dedicated shower.
Living in it with the boys: what we’d change
We’ve been living in the van since early 2026. Most of the build has held up well, and a few things taught us lessons.
- The front gets cold in winter. The diesel heater keeps the back very warm, but the thermostat sits in the warm back and shuts the heater off, so the front kitchen area runs cold. We’d re-route the heater vents, and in Michael’s words: “I regret not adding any floor heating.”
- The blinds aren’t blackout. We added cushions that cover the living-area windows at night and double as seats by day.
- Order of operations. Finish electrical and plumbing before you build the platform, or you’ll be working in a very tight space.
Safety: This is what we did in our own van, not professional advice. We’re not licensed electricians, plumbers or gas fitters. Consult a licensed professional for electrical, propane and plumbing work.
If you want the exact gear, our van build parts list has everything we’re happy to link, and the van build overview walks through every system.
FAQ
What van did you use for your family camper van build?
A 2024 Mercedes Sprinter with the 170” wheelbase and all-wheel drive. It started as a crew van with the Mercedes three-seat bench in the back. We built it out from July 2025 into early 2026.
How do four people sleep in your van?
Right now, all four of us sleep on a floor couch on the platform that unfolds into a full-size bed. There’s also a DIY elevator bed above the platform that will sleep Spencer when he wants his own bed.
How did you get four seats in a Sprinter crew van?
We replaced the Mercedes three-seat bench with a two-seat Ford Transit bench, which freed up a lot of room, and put the front passenger seat on a swivel base. Seat mounting is safety-critical, so please get professional advice for your own van.
Where do the kids’ toys go?
Under the floor they play on. The raised platform is full of lidded cubbies, with a bigger garage below for gear. In our first van the toys were everywhere; now they all have a spot.
What’s your favourite part of the build?
For Michael, the built-in dishwasher. For Spencer, walking along the platform.
Some links here are affiliate links: we may earn a small commission, at no extra cost to you. Details